Katelyn Tan | A Singapore Beauty, Travel and Lifestyle Blogger
Showing posts with label beauty tips. Show all posts

Make Up For Ever - Make Up School @ Ngee Ann City + Tutorial

Thursday, 20 March 2014

I'm back with another post!
Here's one for Make Up For Ever.
P.S Their makeup products took the place of my past go-to-products!
My current go-to-products are mostly from Make Up For Ever.
Continue reading to know why ;)

Note: Those text with hyperlinks are links to reviews I did in the past.

♥♥♥

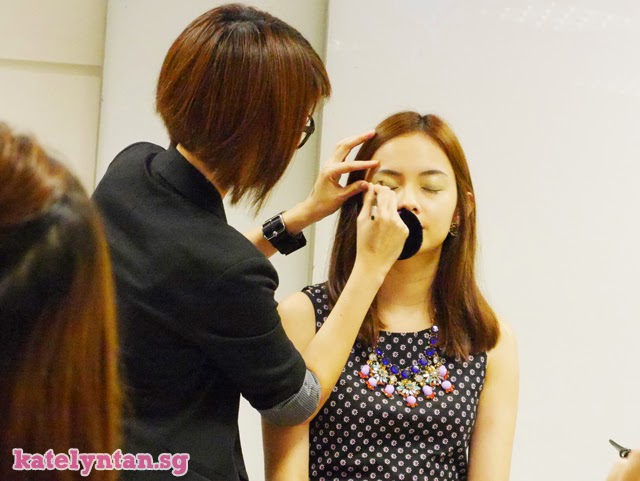
Let's start with my make up lesson at Make Up For Ever's MAKE UP SCHOOL!
I went to the outlet at Ngee Ann City for a one hour lesson on basic/everyday look makeup. 

Make Up For Ever has their own separate area at Ngee Ann City Sephora.

Lesson/makeover area.

All the cleaning stuffs for you to remove whatever dirt/makeup you have on your face.
Also, there are disposable sponges and even mascara applicator!
So you don't have to worry that you have to use what others used before. Hygienic right?

A make up profile for you to record the steps that you did and products used.

I didn't write anything on the booklet myself cause Amber help me do all of those!
She helped me fill up some stuffs after each part. Eg. Face, Eye, Lips. So sweet of her right?
P.S Amber is one of MUFE's Make Up Artiste.

Now I will list all the products I used on my face that day!
In-between I will also slot in a couple of reviews :)
And I will have a tutorial at the end (using most of these products).


First Photo: All the basics for a flawless skin!
Left to Right:
1. HD Elixir (to hydrate your skin)
2. All Mat Primer (matifying base)
3. HD Primer (green to color correct skin redness)
4. HD Foundation
5. HD Invisible Cover Concealor
6. HD Microfinish Powder

Second Photo: Contouring!
Right side Top to Bottom:
1. Powder Blush
2. Contour Kit

Your make up artiste will help you choose your shades and products suited for your skin.
Then you will be taught how to make use of these products to achieve flawless smooth skin!
Eg. when concealing, dap the concealor directly on problem areas then spread out the corners.
Here you will also learn how to use coutour powder and blush to make your face look slimmer!

[Review: HD Primer in Green]

The green primer may look a lil scary but...
it's actually just a light hint of green to cancel out the redness on the skin!

[Review: HD Invisible Concealor]

Got to try a new concealor and I would say this has a medium coverage.
If I have really huge pimples, this won't be able to cover them.
This is where I will recommend MUFE Full Cover Concealor! My fav!
But still I love how this concealor is light weight and almost "invisible" looking.

[Review: HD Foundation]

Love how light weight this foundation is.
It give medium to full coverage and is buildable :)
They have lots of shades available. You are bound to find you exact match!

[Review: HD Microfinish Powder]

Love how MUFE packaged their powder.
It has this soft sifter so you won't have to pour out the powder and make a mess out of it ;)
I know some of you ladies are worried if it will leave a white cast.
The thing is... don't apply too much. Just a think layer will do.
I used this many times and even took photos under flash and yupps no white cast :)
This product is light, mattifies and leaves the skin smooth.


For natural looking eyes!
1. Eyeshadow
2. Eye Brow Pencil
3. Aqua Eyes Eyeliner

P.S I realized I forgot to take photo of most of the eye products used.
Anyways, I'm using similar shades of eyeshadows in the tutorial later.
Here I was taught how to create a natural everyday eye look.

[Review: Aqua Eyes Eyeliner]
I can use it to draw thin/thick lines.
P.S I didn't sharpen the eyeliner before drawing the thin line.
Rubbed my wrist till it turned red and it only faded a lil, no smudges at all!
Washed it under water and it was still intact too, no smudges :)


Pretty pink lips!
Left to Right:
1. Lip Gloss
2. Rouge Artist Intense Lipstick
3. Aqua Lip Water Proof Lipliner


A photo with Amber!
Amber did the left side of my face for me while I did the right.
That's how you slowly learn step by step ;)
Thank you Amber for teaching me new make up tips!

Above is the brochure for MUFE's MAKE UP SCHOOL!
The one which I attended is the 75mins complete make up lesson.

♥♥♥

Now time for a Make Up Tutorial!

All the products used for this tutorial!
Most of which are my current go to makeup products.

I will be listing the products used in each step.
Will also do a couple of reviews along the way :)


Step 1: Prime the face + Conceal blemishes
Products used: HD Primer in Green + HD Invisible concealor

Step 2: Apply foundation on the whole face
(I like to apply excess foundation on my lips so it acts as a lip concealor too)
Product used: HD Foundation

Step 3: Contour and highlight the nose
You can also use it to contour your forehead and jawline for a looking slimmer face!
Product used: Contour Kit

P.S I didn't use any blush here. Will have a separate post for the blush! ;)

I don't have MUFE's brow pencil with me.
Did my brow using the method Amber taught me :)
Line 1 is where the brow should start.
Line 3 is where the brow should end.
Line 2 is where the curve should be.


Step 1: Fill the whole lid "Metallic Taupe" eyeshadow

Step 2: Use "Espresso" eyeshadow on the outer 1/3 of the eye
(I applied the same eyeshadow near the lash line too)

Step 3: Apply on the "Gold Pink" eyeshadow below the
lower lash linefor a aegyo sal effect

Step 4: Draw a thin line near the upper lash line
Product used: Aqua Eyes Eyeliner

Step 5: Line the lower waterline
Product used: Aqua Eyes Eyeliner

Step 6: Apply mascara on both upper and lower lashes


Step 1: Conceal your lips
(Optional: line your lips using a lip pencil)

Step 2: Apply a light pink shade (N21 Natural) on the lips

Step 3: Apply a dark pink shade (37 Intense) to the center of
the lips, for a smooth gradient effect use your fingers to blend


This is the swatches for the lip palette I used - Rouge Artist Lip Palette in Warm Pink Shades.
You can find my review here: Route Artist Lip Palette by MUFE

Here's the final look!

♥♥♥

Shall end this blog post with some good news for all of you! :)
1. Head over to Make Up For Ever SG Facebook Page for a freebie!

2. Join them for a COMPLIMENTARY FLASH MAKEOVER at their Beauty Pit Stop
& HD Test Studio and stand a chance to win $150 worth of MUFE products!
Location: Sephora Ion
Period: 6 March to 2nd April 2014

Do pop by the event or any MUFE's counters to try their products!
You will fall in love with MUFE. Trust me ;)

What's In My Travel Makeup Bag?

Saturday, 1 February 2014

So I went to HK sometime back and here's a what's in my travel makeup bag post!

♥♥♥

All the items that I brought with me to Hong Kong.

[Review] Make Up For Ever Pro Finish

Sunday, 17 November 2013

Was invited to try out Make Up For Ever's new Pro Finish foundation
at their newly renovated corner at Ngee Ann City Sephora!
Their shop is super pretty! I love the makeup area!

Photo at the make up area!
Here is where MUFE's artist will test your shades for you, etc.

I've always wanted such a make up mirror at home!
Nearly bought one but it never did happen hahas.

- online description -
With its transforming texture, PRO FINISH is the 1st multi-use powder foundation that allows you to fully customize your finish and coverage level. Formulated with exclusive bio-mimetic coated pigments, its breakthrough formula can be used wet or dry. Apply it wet for a sheer semi-matte perfection or dry for a full coverage, matte result.

For oily skin, it is recommended to apply dry.
For dry skin, it is recommended to apply wet.

Created with talc lightweight formula, its texture is long lasting, has buildable coverage with no chalky effect and easily blends for a perfect professional result in just minutes. Enriched with hydrating ingredients, PRO FINISH corrects and evens the complexion without drying our the skin. Choose from its wide range of shades to find your perfect match.

There are 25 shades available!
You are bound to find one that fully matches your skin tone and color!

MUFE's makeup artist helped me picked my shade.
And… she is super pro! The first shade she picked is the correct one!
She gave me two shades to try, the other was two shades lighter.
Anyways my initial foundation was only removed for half the face.
So for the photo above, left is purely my initial foundation, right is purely MUFE Pro Finish.
After that, MUFE Pro Finish was applied on the other side without removing the initial foundation.
And… it looks as matte and non-cakey! All you have to do is to blot first ;)

Tips when choosing your foundation:
Always go a shade lighter.
Cause whatever you apply on your skin will oxidize.
When it oxidize, the color will turn darker!

See the foundation applied on the right.
It suits my natural color (neck color) right?
While on the left it is the foundation I had on since morning.
It has oxidized and it looked darker than my natural skin tone!

The Pro Finish foundation provides a medium to full coverage.
I was told that it can somewhat give a light coverage too.
For light coverage: use a brush
For medium coverage: lightly swipe with a sponge
For full coverage: dap on with a sponge

Here is my Pro Finish foundation!
I am using 120 Neutral Ivory.
P.S increasing number does not mean it is of a darker shade.
Cause the numbers are arranged according to their tone and color!

I was told that I should be a neutral.
From what I know, you can look at the veins on your wrist to know what is your undertone.
Blue means you have a cool undertone. Green means you have a warm undertone.
For me, I have blueish green veins LOL so I am a neutral I guess.

Also, I was told that can know your undertone by looking at
what type of accessories and lip color looks best on you.
For me, I am ok with both gold and silver accessories.
As for lip color, it would be pink! :)

My overall review:
I love this foundation. It is really smooth and not cakey even though it was later applied over another foundation. This product can be use at a finishing powder too. I think the texture and finish is comparable to those mad expensive high end brands! Also, I love how MUFE made all 25 shades available in Singapore. It is irritating how some brands only bring in like 5 out of 15 colors, thinking that those 5 shades will definitely suit majority skin types. But the moment you have that skin color that it neither here nor there, you can never find a perfect shade with those. But with MUFE's 25 shades Pro Finish, you can surely find a true match regardless of what skin tone and skin color you have ;)

All the goodies I received from Make Up For Ever that day :)
I have already reviewed the Holidays collection and Smokey Extravagant ;)

As for this Make Up For Ever Full Cover Concealor,
I'm sure I don't need to intro it anymore.
It has been highly raved in the States (reason why I bought my first).
I've reviewed it on my blog before - Make Up For Ever Full Cover Concealor Review.
It covers up really really really well and it is waterproof!
The shade I bought was shade 8 which it no longer my shade.
It used to be my shade when I just came back from the States cause I was tanned then.
But as my skin color slowly lightens, (since that review post) it no longer suit me.
I'm currently a shade 6 hahahas.

Anyways, my study buddy uses this too!
She is super cute. She told me she splashed water on her face after applying this.
And she could see the water droplets on her skin.
I was like "I did that before as well hahahas". It is really waterproof and it won't budge.
Please take my word for this product and get one yourself.
And… do go down to the stores to get help on picking the correct shade!

That's all for this post!
Thank you MUFE for always being so generous! :)

Beauty Destination by L’Oreal Paris - Recreate the look of Katniss Everdeen in The Hunger Games Catching Fire

Tuesday, 29 October 2013

Hello all! I'm back with another post for Beauty Destination :)

This month, Beauty Destination will teach you
how you can recreate Katniss Everdeen’s look
in The Hunger Games Catching Fire!


What’s more, participate in the Big Bolder Eyes Contest and stand to win $150 worth of L’OrĂ©al Paris products and a pair of tickets to catch The Hunger Games movie.

All the products needed for the look ;)

A demo was done on Jessica :)

The highlight product featured this month is the...
Superliner Blackbuster
:: It is the 1st marker pen liner
:: Great for beginners
:: Easy to use to create big bolder eyes

Superliner Blackbuster is available at $20.90 at Watsons, Guardian, Sasa, selected Super & Hypermarkets and departmental stores.

P.S Photo from my instagram :)

♥♥♥


Step One:
Apply a layer of beige eyeshadow over the entire lid.
Product used - L’Oreal Color Infaillible in 002 Hourglass Beige
Love this shade. It really brightens up the eye area!

Step Two:
Apply a layer of green eyeshadow over the lid till the crease.
Product used - L’Oreal Color Riche Les Ombres S4 Tropical Tutu
This adds a light pop of color to your eyes!

Step Three:
Apply a layer of light grey/silver over the green.
Product used - L’Oreal Color Riche Les Ombres E5 Velours Noir
This helps to tone down the green a little.

Step Four:
Apply a dark grey shade on the outer corner of the eye.
Product used - L’Oreal Color Riche Les Ombres E5 Velours Noir
This helps you achieve a subtle smokey eye look.

Step Five:
Draw a bold winged black eyeliner.
Product used - L’Oreal Superliner Blackbuster
The featured product to help you create the bold eyes that Katniss has!

Step Six:
Curl your lashes, apply mascara and stick on the crystals using eyelash glue.
Product used - L’Oreal False Lash Architect 4D Effect Fibers Waterproof mascara
These are the final touches to recreate Katniss Everdeen's look in The Hunger Games Catching Fire!

That's all for the tutorial! :)

Here's the final look :)

If my photos weren't clear enough...
Here is a tutorial video done by Jessica :)

♥♥♥


That's all for this post!
Remember to check out Beauty Destination for more beauty tips & enjoy the tutorial!
Happy Halloween everyone :)